Creating an online experience for a start-up airline with a focus on the flight booking process
Project Type: UX/Full Product Design

Providing an experience that is fast, easy, and intuitive: one that's based on a deep understanding of target users.
Overview
This project is the culmination of project work done for the UX Design Institute's Professional Diploma in UX Design. The client for this project is a start-up airline that wants to create an online platform for booking flights. In an industry full of different booking processes, I wanted to look at what other airlines are doing, learn from their mistakes, and take inspiration from the things they do right. Throughout this case study, I will be using this information to focus my research and ultimately improve upon my designs.
Role
UX Designer - Research, Analysis, Design, Prototyping, Wireframing
The Goal
Create an online experience for searching and booking flights that is fast, easy, and intuitive.
The approach:
RESEARCH: Identifying the problem
Competitive Benchmarking
Research was conducted on competitors to identify what they are doing right and learn from aspects that may be less effective. This was an opportunity to identify the conventions to be followed. A focus was placed on the homepage, how user search and select flights, and how users input their personal information.
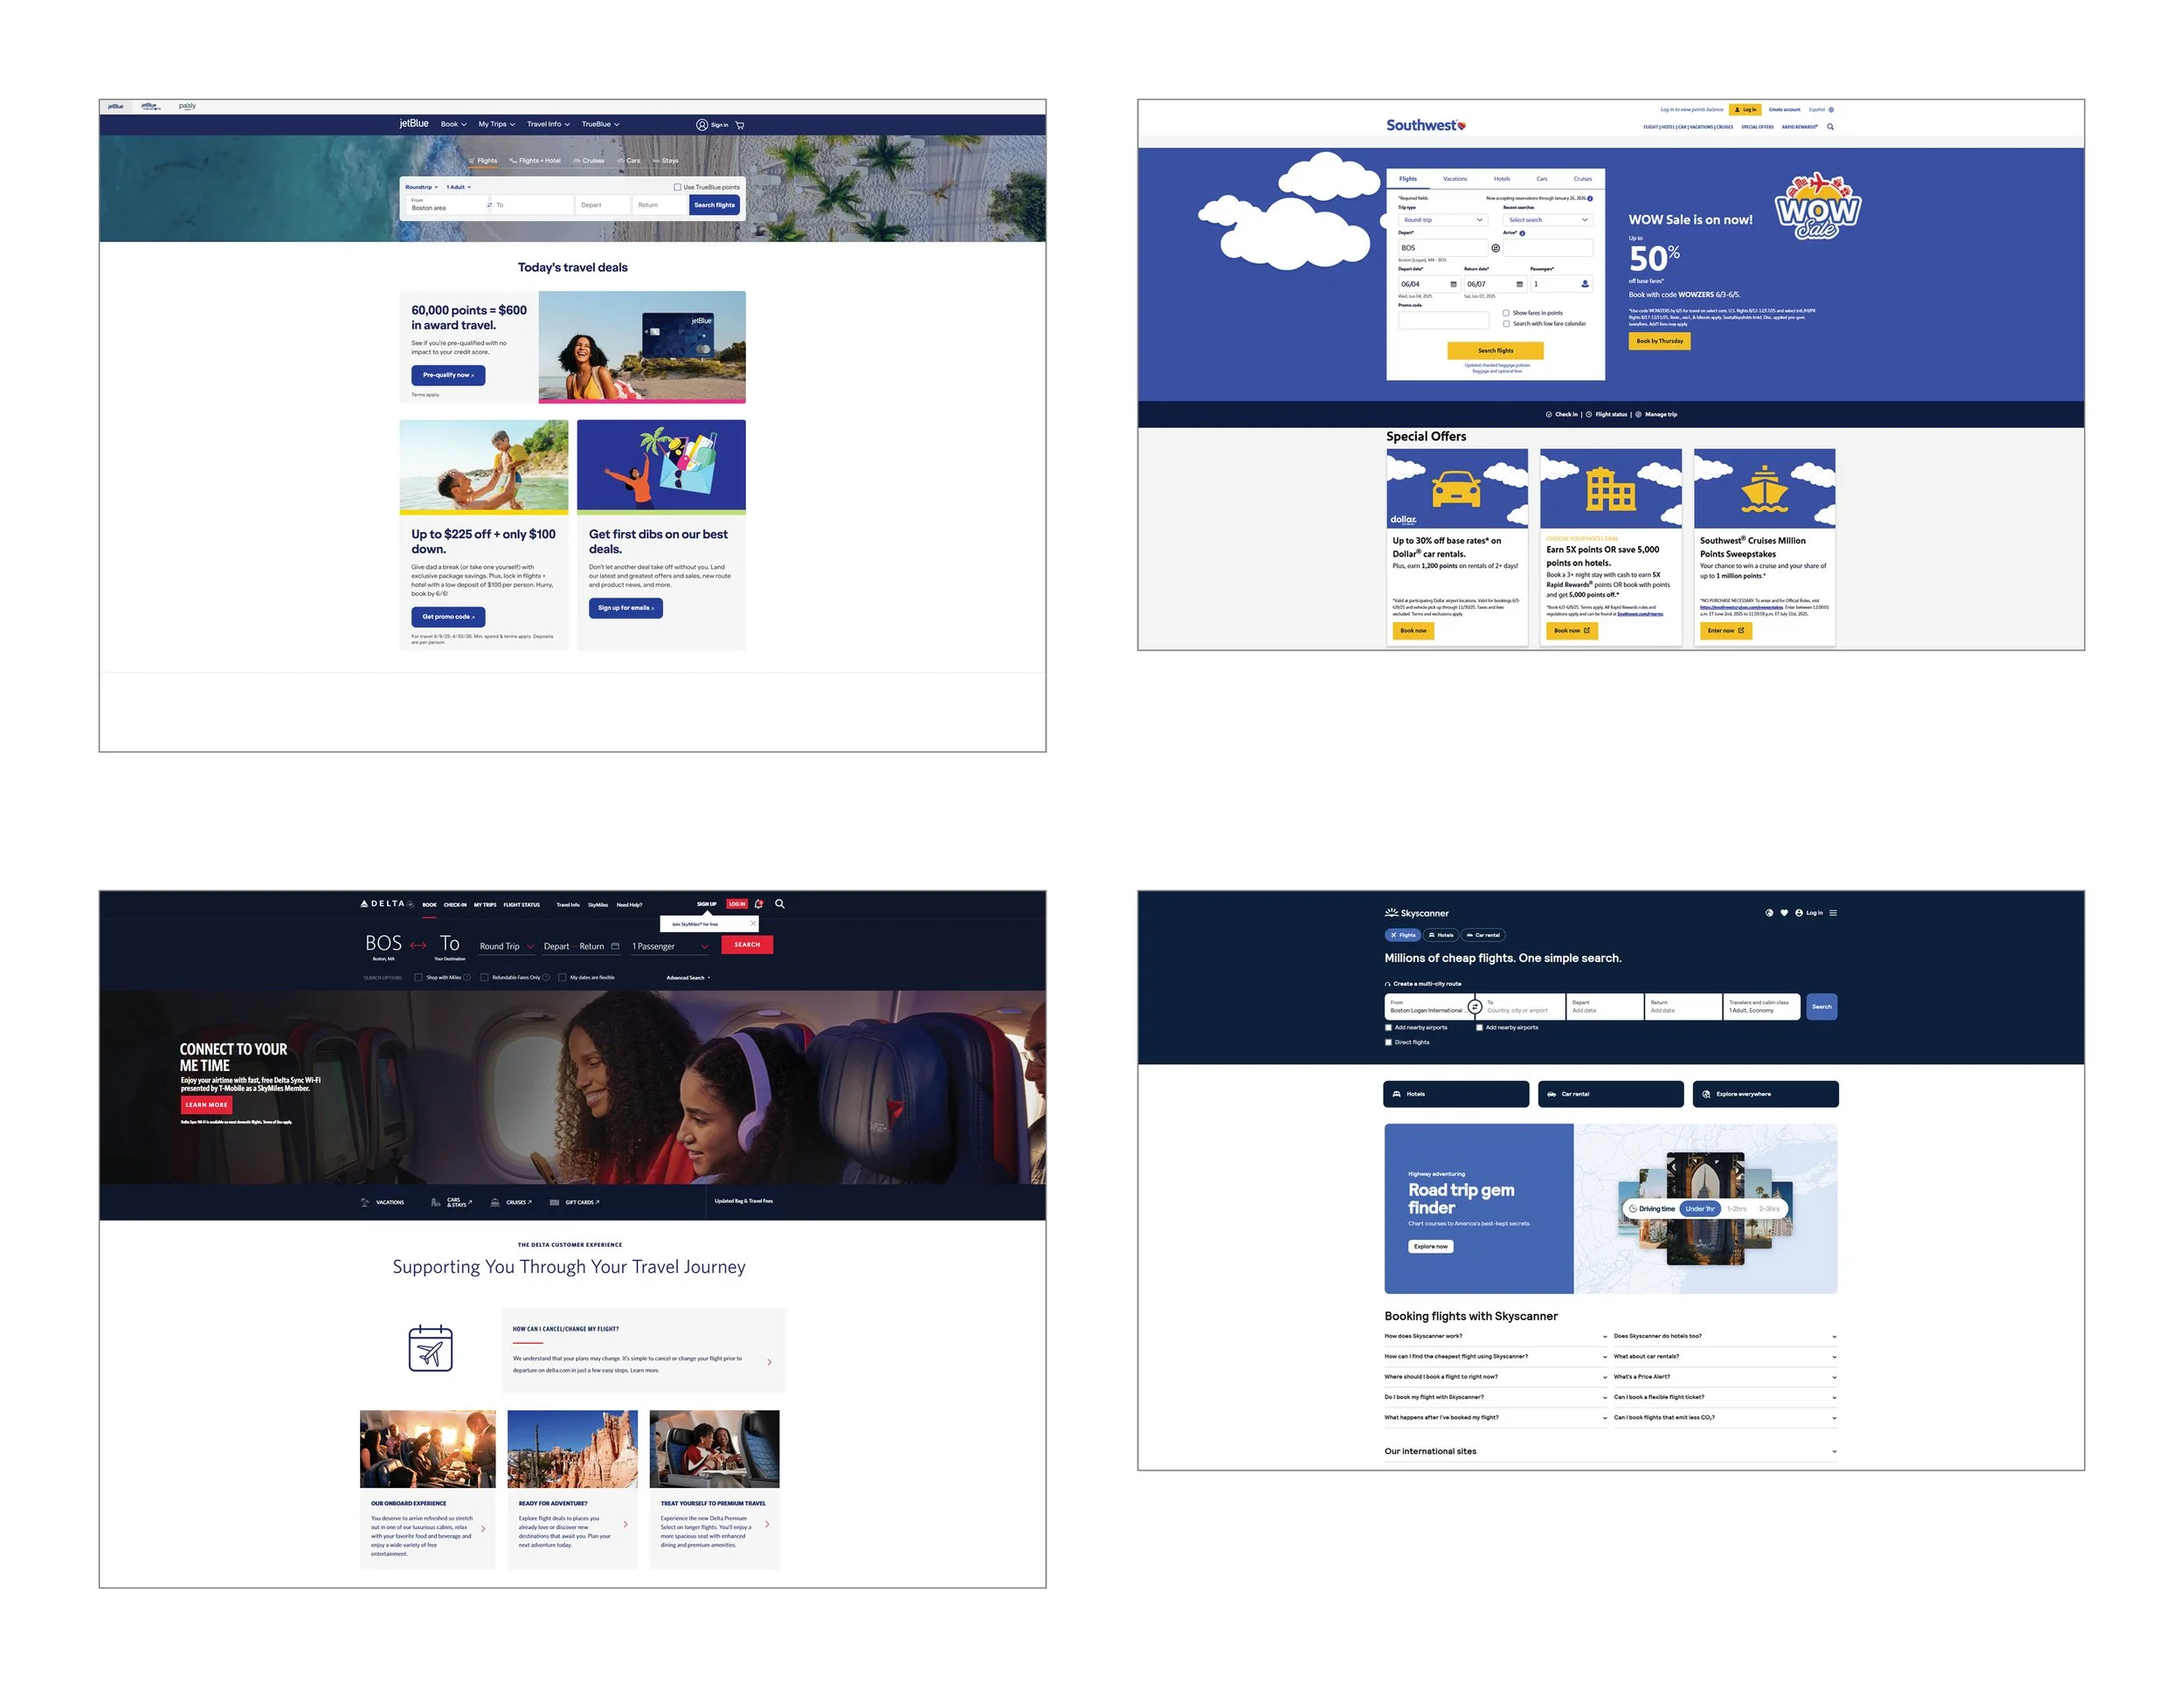
Competitor websites used for Benchmarking
User Research
Usability testing was conducted to collect rich insights directly from the user. I moderated a usability test for an airline's booking process (JetBlue) and for a travel aggregator's booking process (SkyScanner). The goal of this test was to learn about the context of use of people that use these websites: What are they trying to do? Who are they with? Where are they? What devices are they using? I also wanted to learn about the goals and behaviors of customers when booking flights.
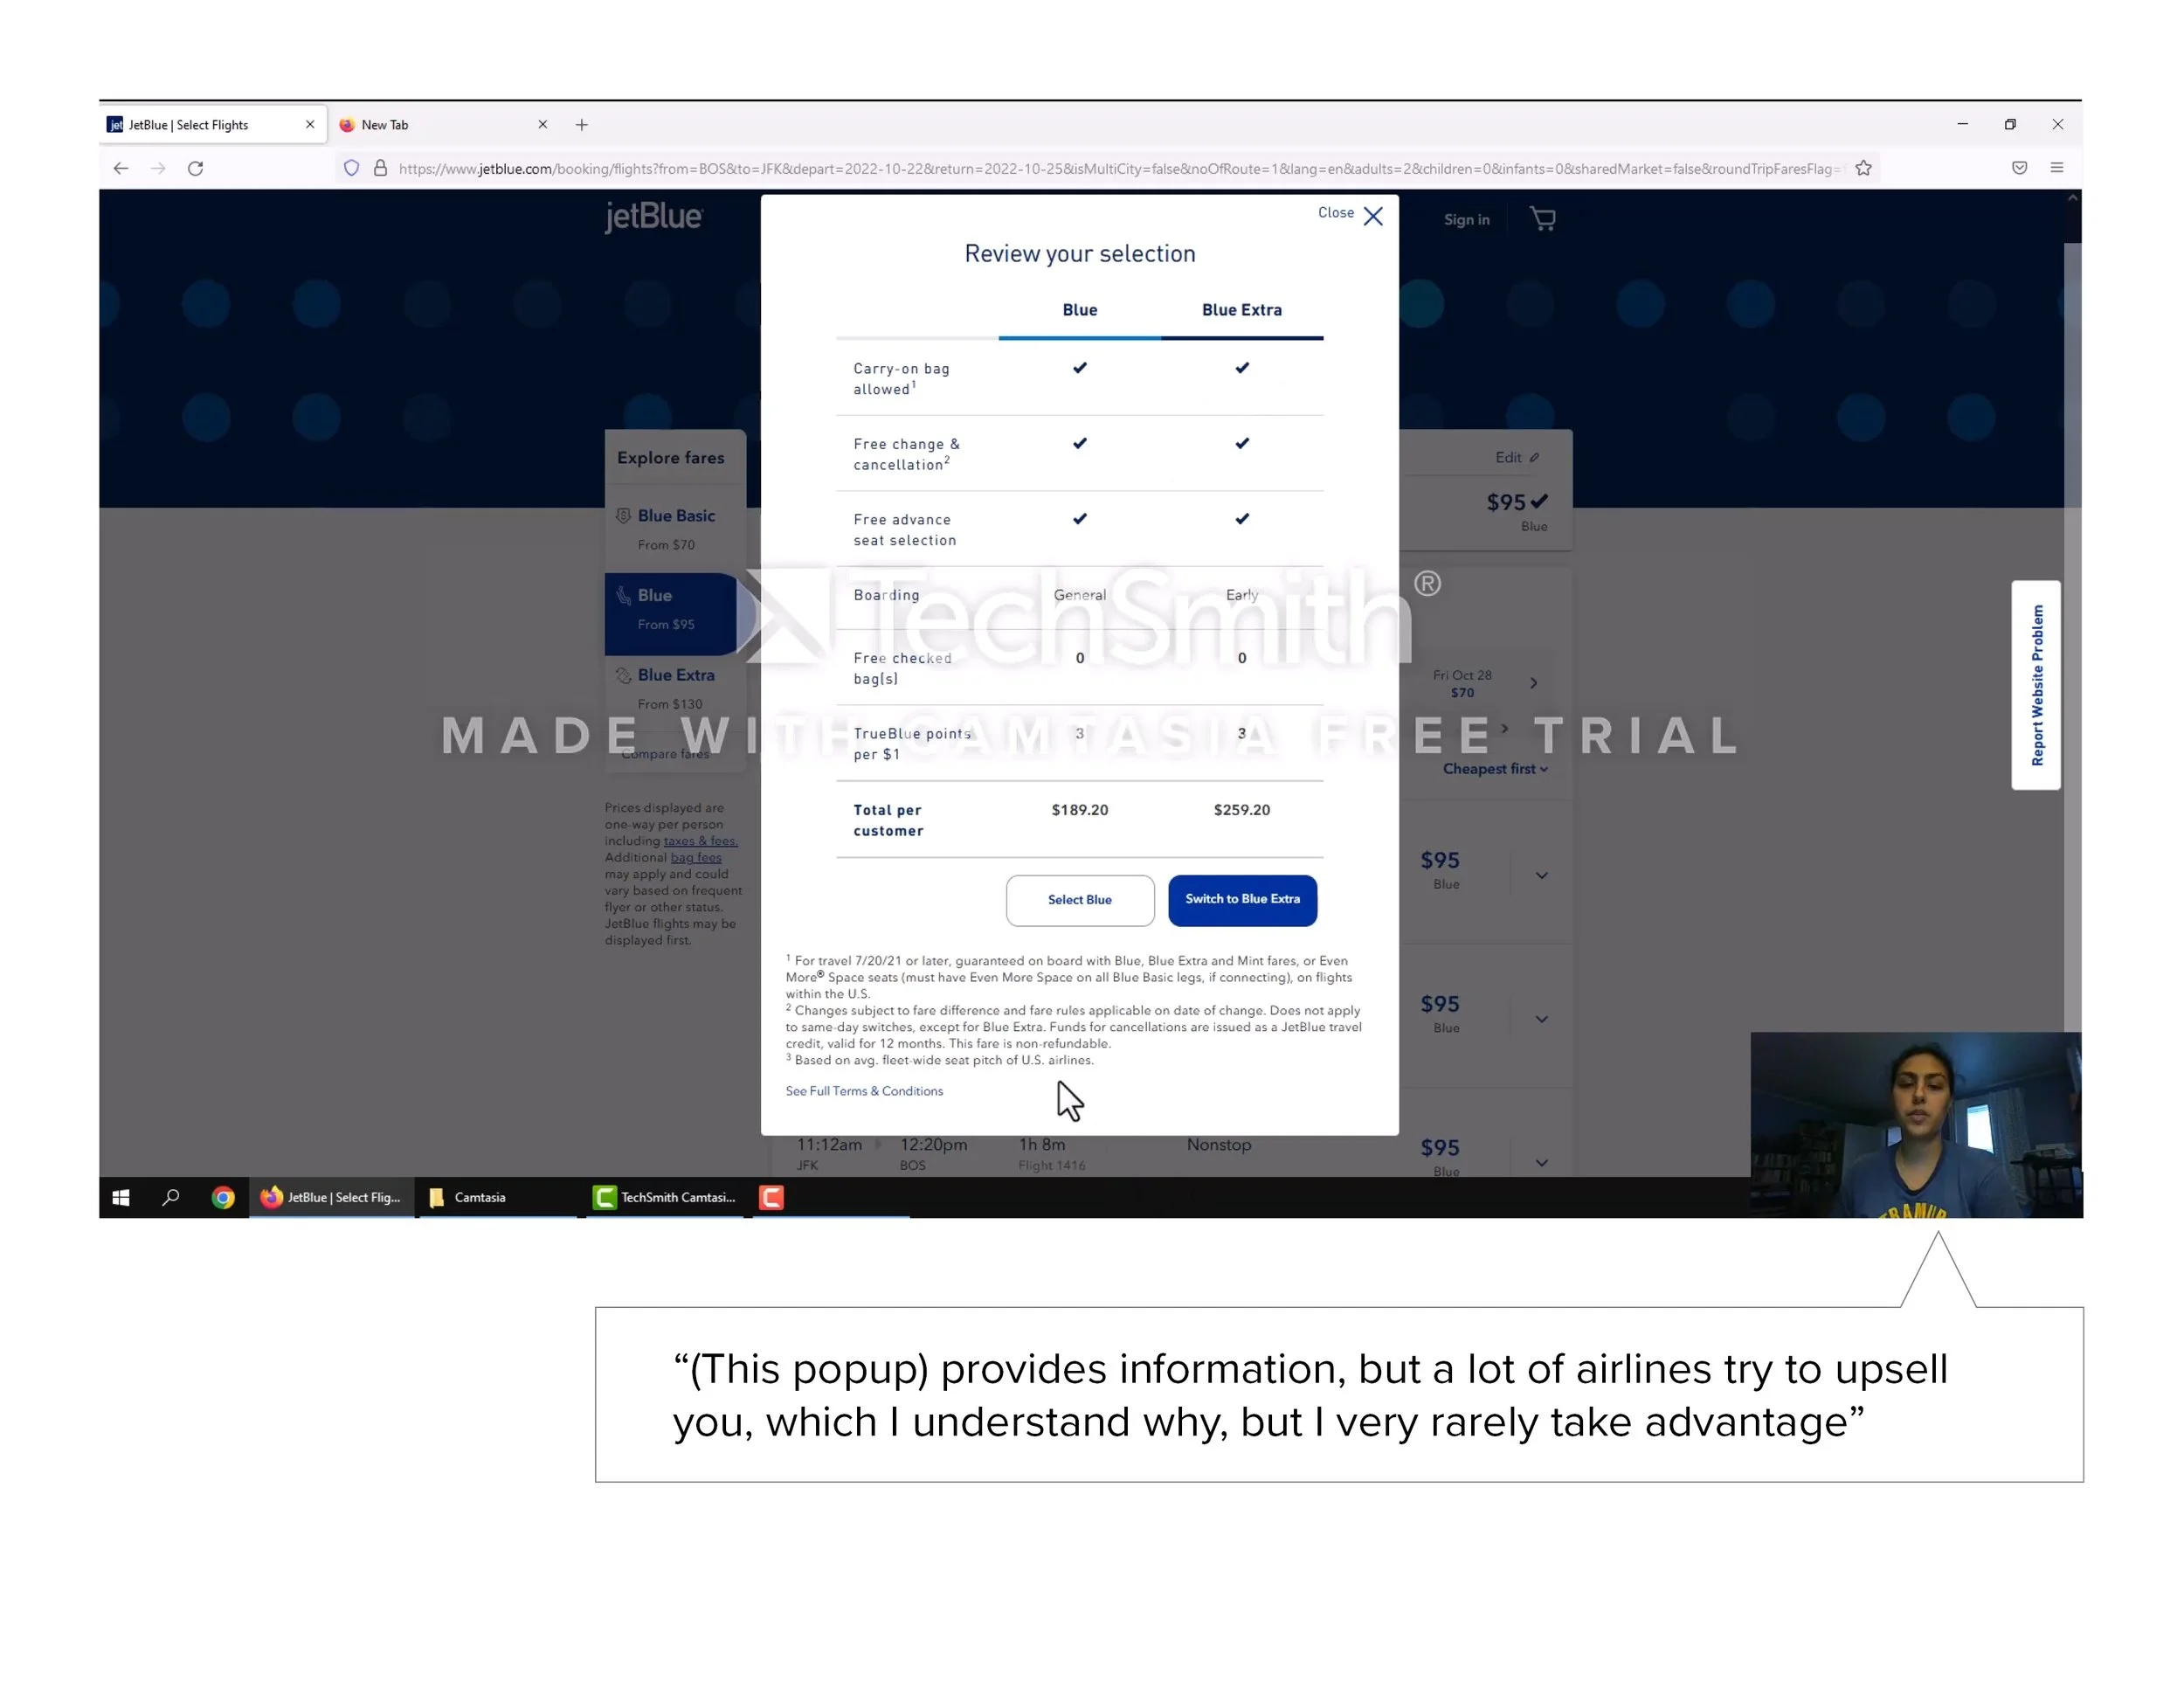
Select Quote from Usability Test. Full usability test may be found here: https://youtu.be/o-k-8uH8IIk
DEFINE: Articulating the problem
Affinity Diagram
After research was conducted, notes were taken from all of the information collected. This information was used to conduct an online affinity diagram session. This step allows for qualitative information to be grouped into larger themes or concepts that describe the current user experience. These can be concepts such as user goals, behaviors, pain points, mental models, or contextual information.
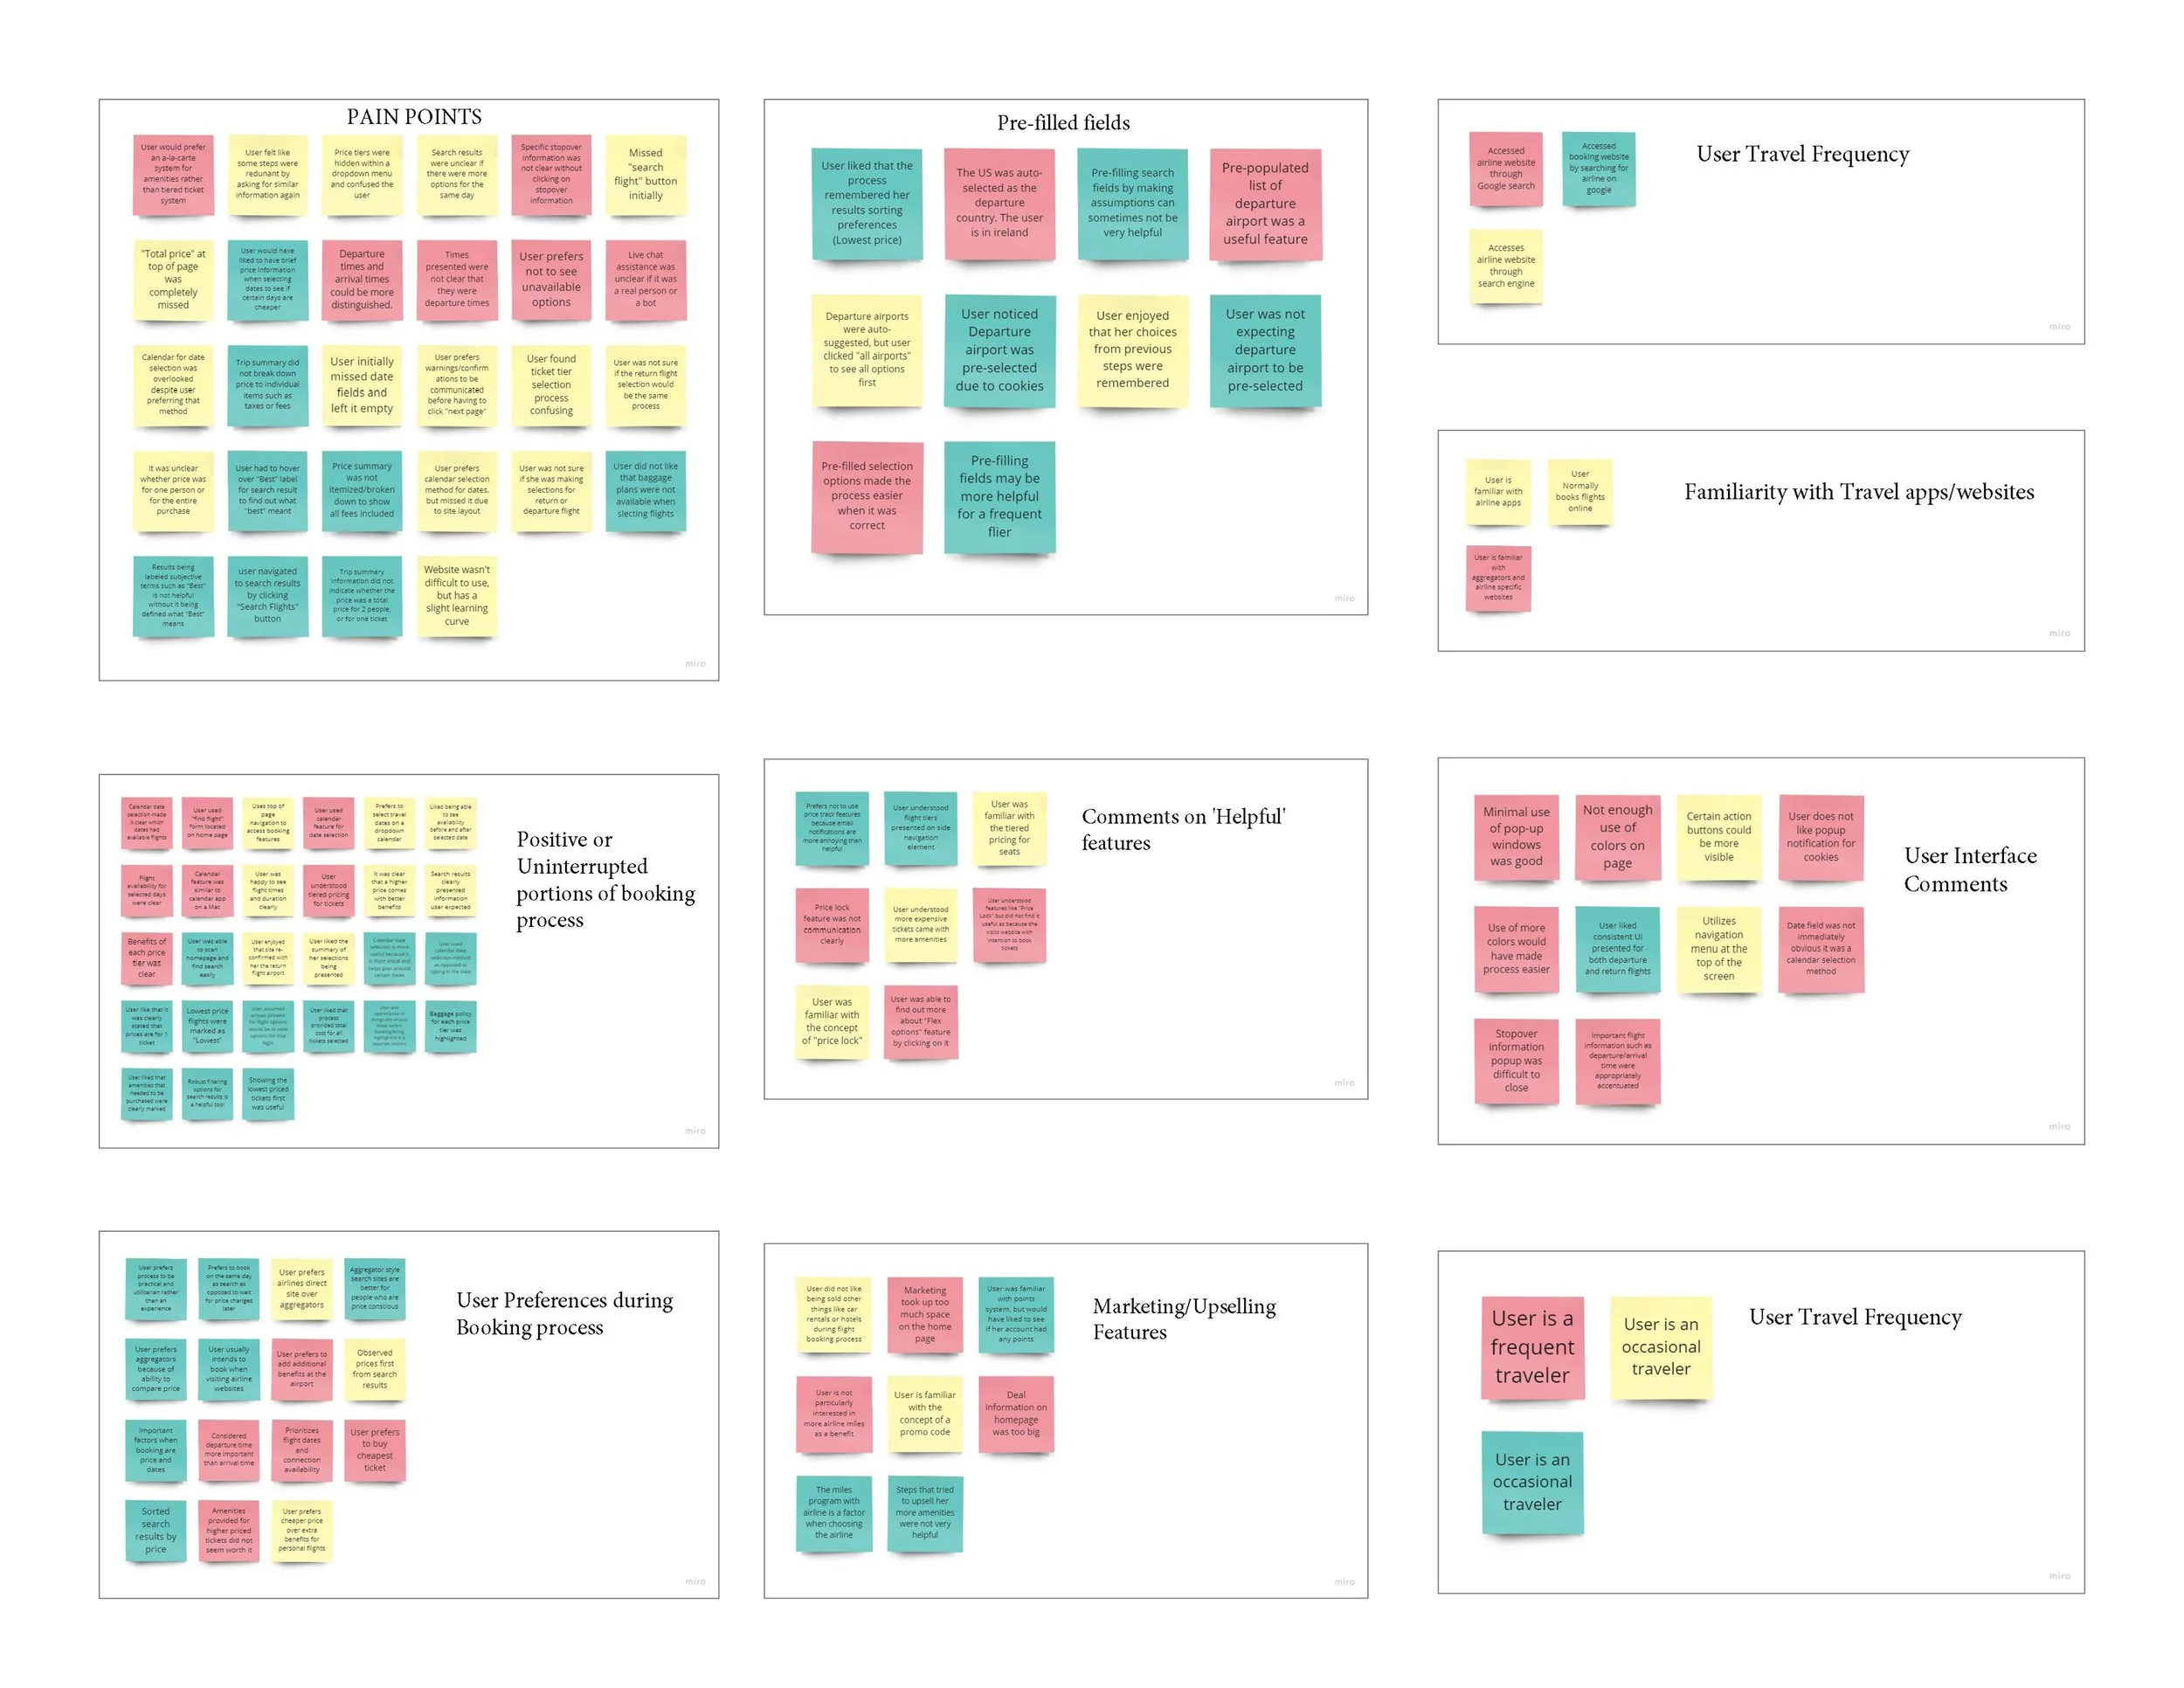
Affinity Diagram produced from research insights
Customer Journey Map
To assign even more structure to my research data, a customer journey map was created to visualize user sentiment as they engaged with the flighting booking process. High level steps of the process were defined, and the user's goals, positive interactions, and pain points for each step were documented.

Customer Journey Map of Flight Booking Process
Design: Solving the problem
User Flow Diagram
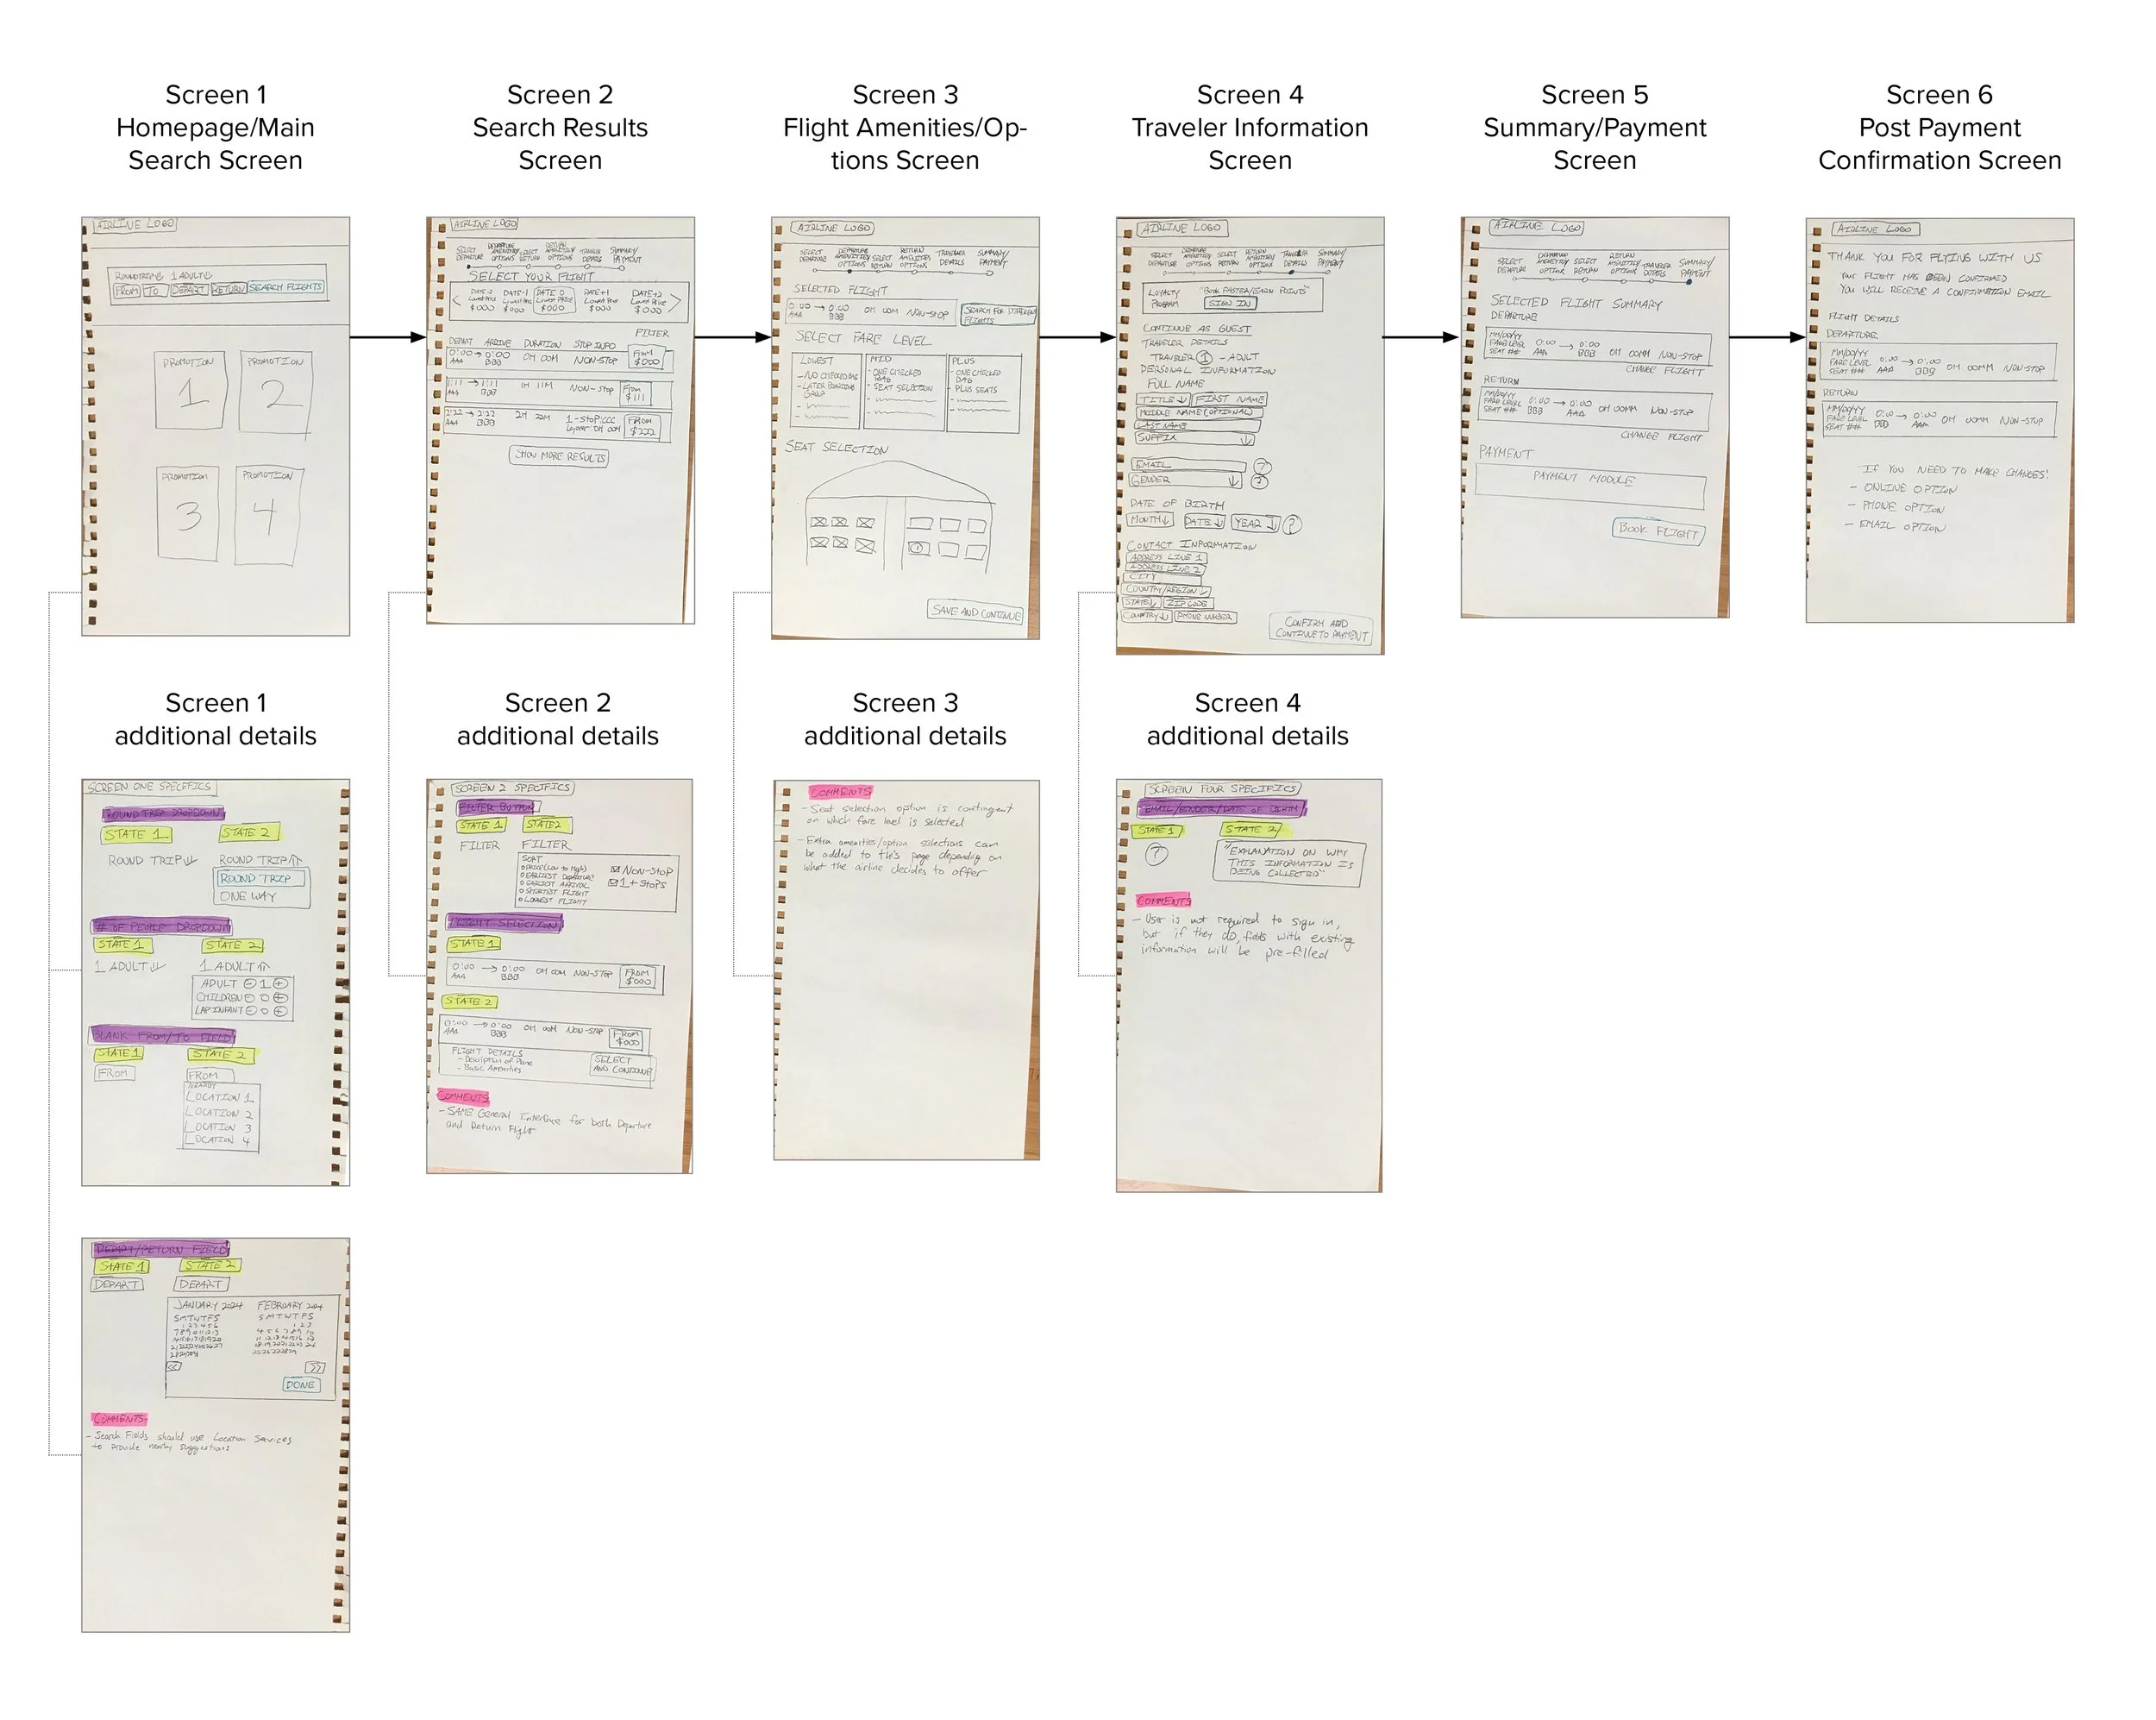
With a sense of how to approach the problem from the research I conducted, I sketched out a user flow diagram for the platform I am designing. This diagram contains the screens that a user will encounter and the interactions they will need to engage in to move through the booking process. This diagram will provide the base skeleton for the screens that need to be designed.

User Flow Diagram
Wireframing and Prototyping
With the user flow and screens outlined, I sketched out possible designs on paper. Through this process, I was able to quickly hash out several iterations before I committed to any one design.
Sketches of screens
Once the final sketch of the design was complete, they were used as a reference to create an interactive medium-fidelity prototype. Each sketch was converted to its corresponding screen with interactive hotspots inserted where necessary.

Select Screens from medium-fidelity prototype
User testing was conducted with the interactive prototype using the same process as in the initial research portion of the design process. Feedback was collected, and the design was iterated upon.
The Results
Preparing the Final Prototype for Handover to the Development Team
Once a final design was completed, annotations were added to the prototype detailing the functionality and behaviors of the product. All details a developer would need to build the product accurately were included.
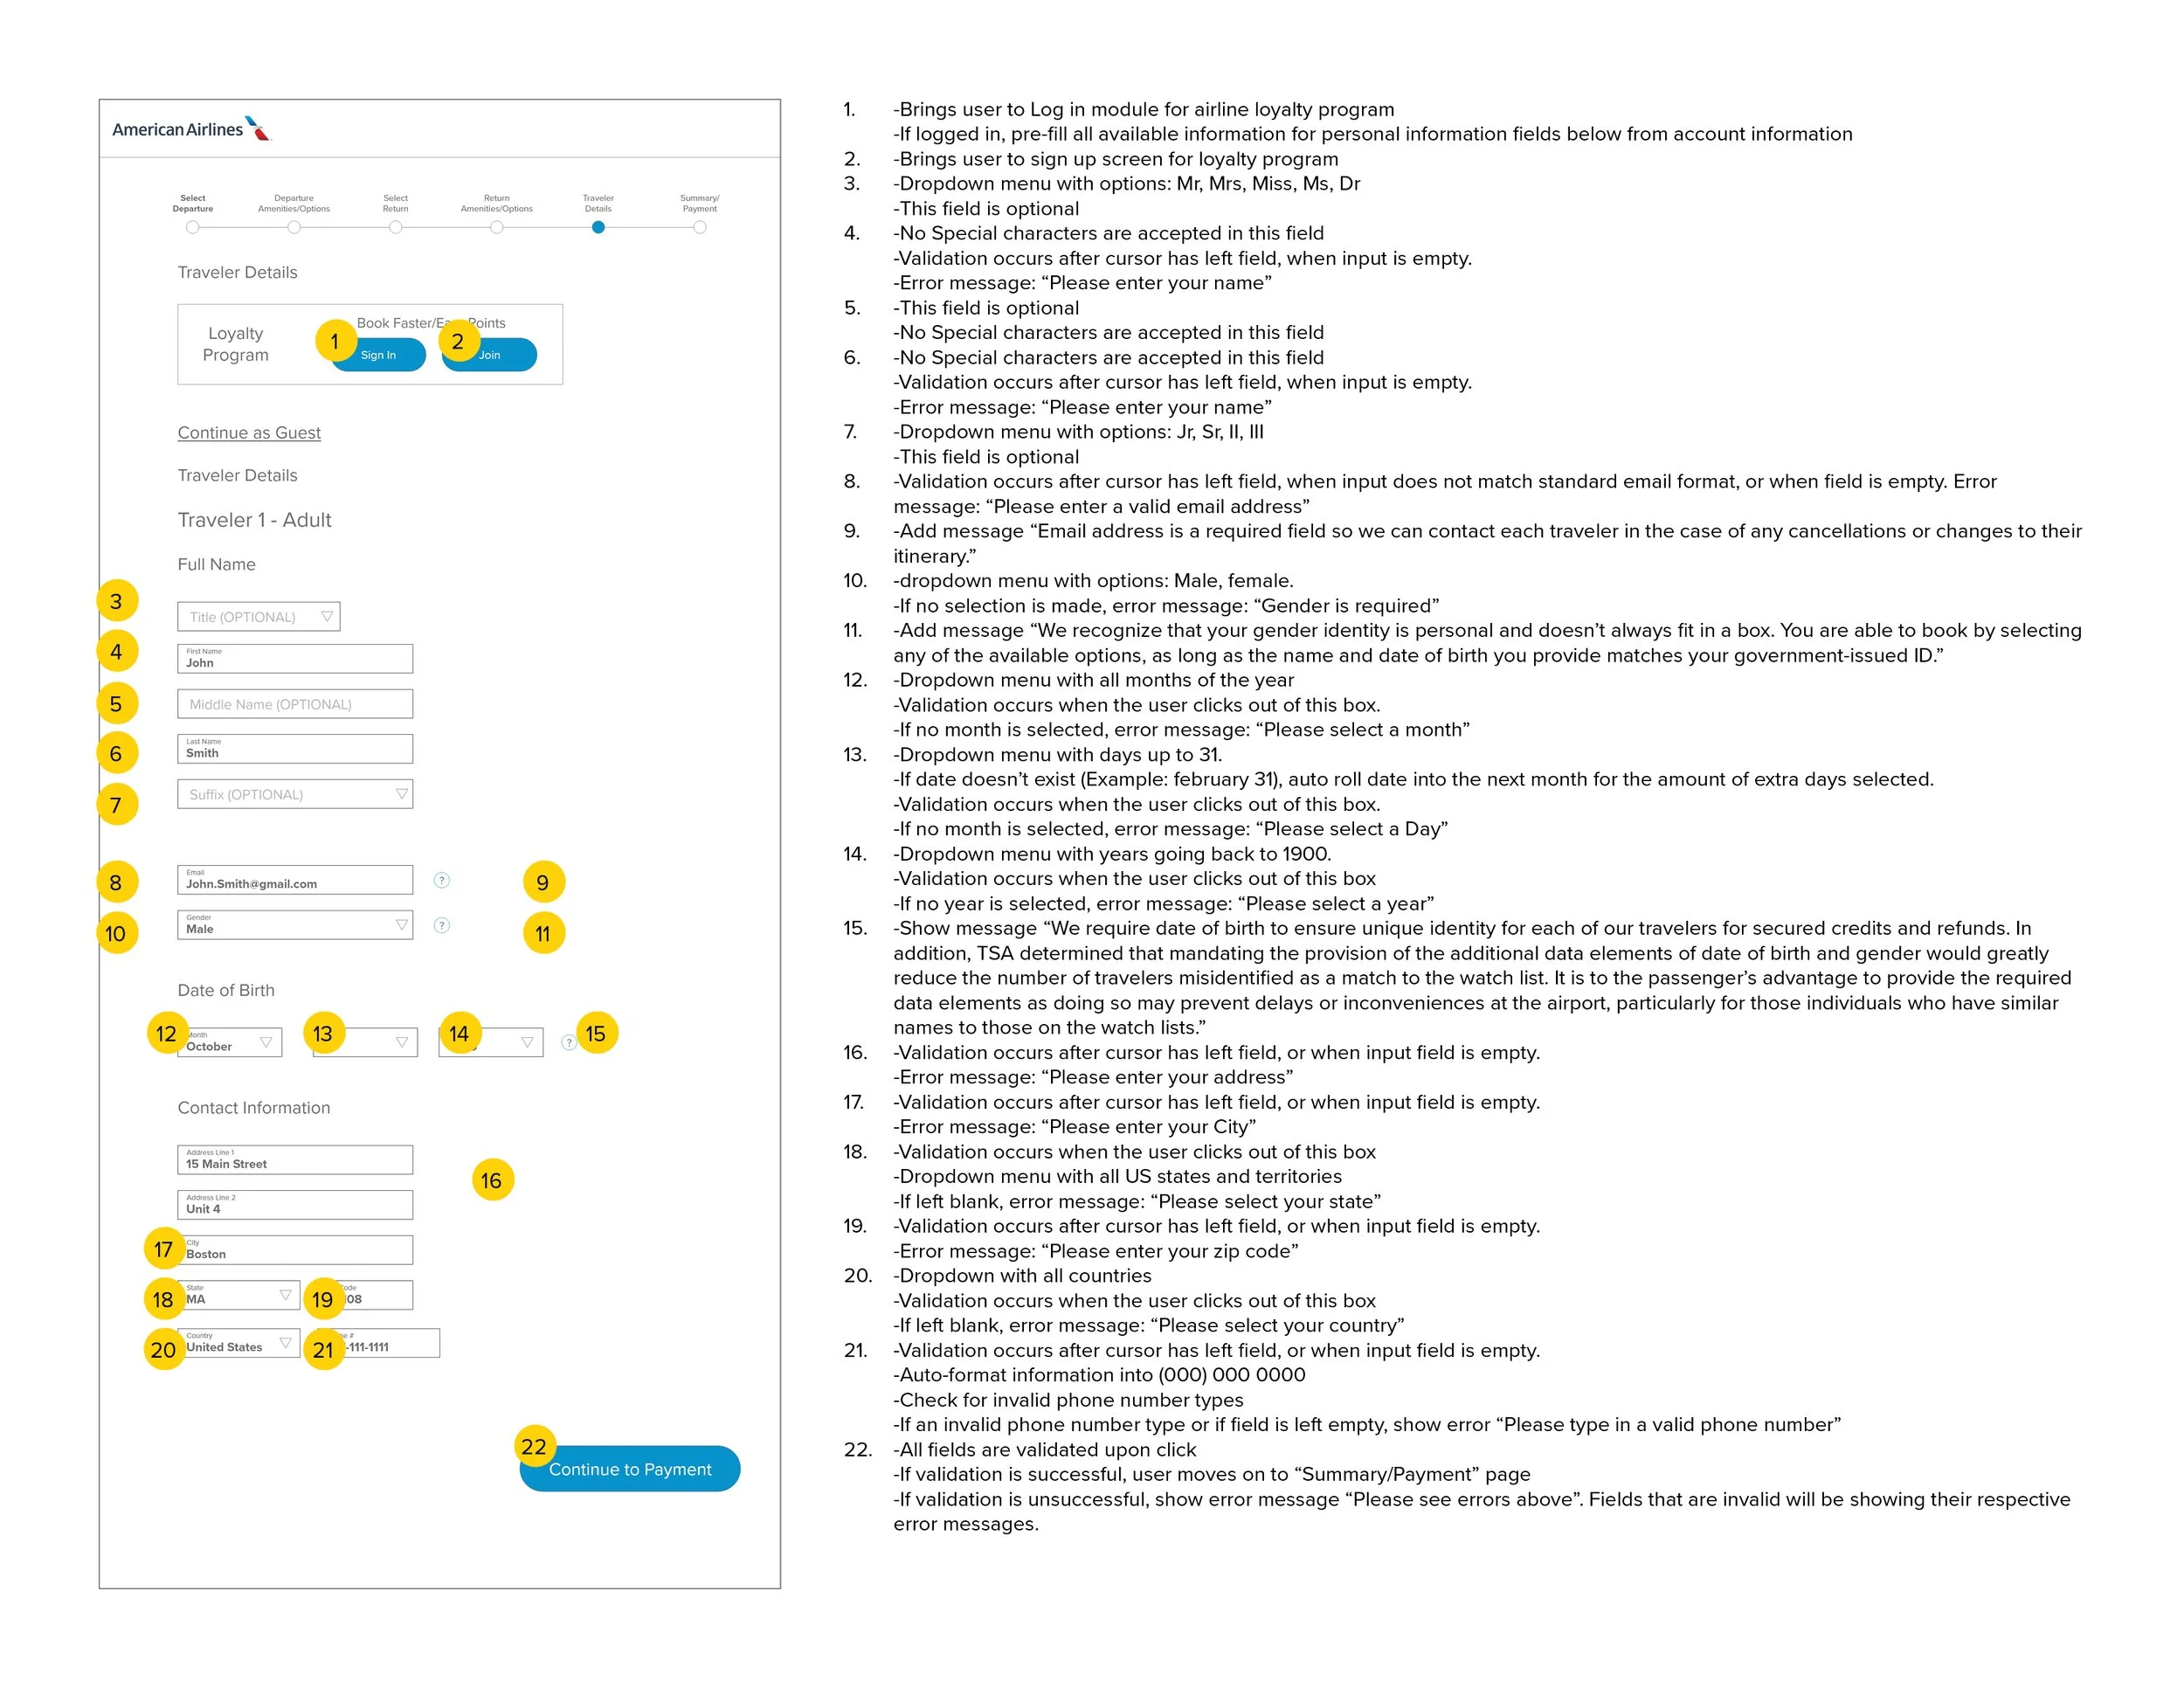
Select set of annotations for a prototype screen. This screen specifically deals with form behavior.
The fully annotated prototype is handed over to the development team for building.
Next Steps
Once the prototype goes into development, I would make sure to be in communication with the development team to ensure all functionality works as it should. Early versions of the product would be tested to ensure there are no bugs or unintended behaviors. Additional user testing would be conducted to make sure that the product provides the intended experience.
While this was a class project and a final product was not actually developed, additional steps if this were developed would include monitoring of the product's effectiveness in the context of business goals. As business objectives evolve, I hope to iterate upon this product to make sure it is meeting the goals of both the user and the business.